 By Claire Whitaker
Updated November 2026
A petsafe 3 in 1 dog harness can handle several jobs: a walking harness, a car safety harness and a lightweight option for quick trips. This guide shows you how to measure your dog, put the harness on correctly, adjust each strap, and switch between configurations without losing fit. By the end, you should be able to check the harness in under two minutes before every outing.
What “3 in 1” Usually Means
Most owners use the term to describe a harness that can be worn in more than one way. The exact configuration depends on the model, so always check the manufacturer’s instructions for your specific version. In general, a 3 in 1 design offers a front attachment point for leash control, a back attachment point for car tethers or everyday leads, and an adjustable body that fits a range of chest sizes. Some versions also convert between a step-in and an over-the-head style.
Shopping for one? See our guide: Buddy Belts Dog Harness vs Standard Step-In Harness: Which Should You Choose?.
Because the features vary, do not assume every strap works the same way across models. Read the label and printed guide before you start.
Before You Buy or Start Fitting: Measure Your Dog
Sizing matters more than the style. A harness that is too loose can slip off, and one that is too tight can rub the armpits or restrict breathing. Measure before you choose a size:
- Chest girth: Wrap a soft tape measure around the widest part of the chest, just behind the front legs. Keep the tape snug but not tight.
- Neck circumference: Measure where a collar would sit, if your dog wears a collar with the harness.
- Body length: Measure from the base of the neck to the base of the tail, if the manufacturer lists this measurement.
- Weight: Use this only as a rough cross-check. Breed and build vary widely, so chest measurement is the more reliable number.
Compare your numbers to the size chart on the packaging or product page. If your dog falls between two sizes, many owners choose the larger size and tighten it, but confirm this against the manufacturer’s guidance.
Tools You Need
- A soft fabric tape measure
- A notepad or phone to record measurements
- Treats for rewarding calm behavior
- A helper, especially for large or anxious dogs
Step-by-Step: Putting On the Harness
The method depends on the configuration, but the general sequence is consistent across most step-in and over-the-head harnesses.
Step 1: Lay Out the Harness
Loosen every strap fully before you start. Identify the chest panel, the front attachment ring, the back attachment point and the buckles. Spread the harness flat so you can see how the pieces connect.
Step 2: Position Your Dog
Ask your dog to sit or stand calmly. Stand beside the dog, not in front, so the dog’s head is not blocked. Offer a treat at nose level to keep attention forward.
Step 3: Attach the Harness
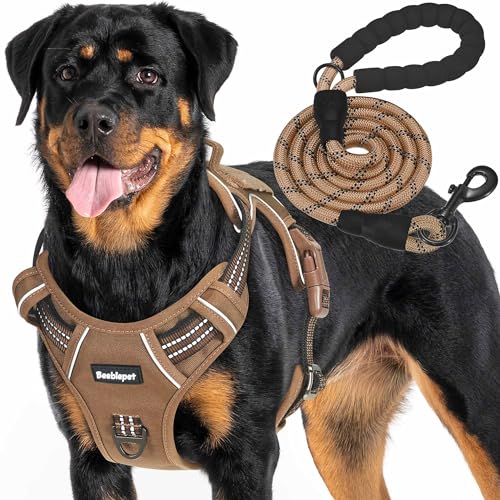
For a step-in style, lift each front leg gently and slide it through the matching opening. Bring the harness up along the chest and body. For an over-the-head style, lower the chest panel over the head, then guide each leg through its opening. Keep the front attachment ring centered on the chest, not drifting toward the throat.
Step 4: Fasten the Buckles
Connect the side or chest buckle and the back buckle. Make sure each click is fully seated. A partly engaged buckle can release under pulling.
Step 5: Adjust the Straps
Tighten the straps until you can slide two fingers flat under each one. Check the chest strap, the body strap and the leg openings separately. The harness should sit high on the chest and should not sag behind the front legs.
Step 6: Check the Fit
Walk a few steps indoors and watch for rubbing, shifting or gaps. Lift each front leg slightly to confirm the straps do not dig in when the leg moves. Look at the armpit area for redness after you remove the harness.
Switching Between Configurations
When you change from a walking setup to a car setup or another attachment point, do not simply swap the leash clip without rechecking fit. Each change can alter how the straps sit. After every switch:
- Confirm the chest panel is still centered.
- Recheck the two-finger test on each strap.
- Make sure no buckle has loosened.
- Take a short test walk or ride to observe the change.
Using the Harness for Walks
For daily walks, attach the leash to the front ring if your goal is to reduce pulling, and to the back ring for a more relaxed walk when your dog is already calm. Front attachment gives you more steering influence, but it is not a training tool on its own. If your dog pulls hard, pair the harness with consistent cues and rewards. For a wider look at how harness design affects walking, see Front-Clip vs Back-Clip Dog Harness: Which One Is Better?.
If you are new to harness walking, Walking Dog with a Harness: Step-by-Step Guide for Safe, Comfortable Walks covers pacing, pauses and leash handling in more detail.
Using the Harness in the Car
When you use the back attachment for a car tether, the tether should be short enough to limit movement but long enough for your dog to sit or lie down comfortably. Attach the tether to a crash-tested vehicle anchor point, not to a loose seat or cargo hook. Keep the harness fitted snugly, because a loose harness can shift in a sudden stop. Check your local vehicle guidance and the manufacturer’s crash-test claims before relying on any restraint for travel; these details vary by model and by vehicle. A related read: PetSafe Nylon Dog Leash: How to Choose, Fit and Use It Safely.
Common Mistakes
- Buying by weight alone. Chest measurement is usually the deciding factor.
- Leaving straps too loose. A loose harness can slip over the head or shift toward the neck.
- Tightening the chest strap too high. This can press on the throat and make walking uncomfortable.
- Ignoring rubbing. Redness or hair loss under the arms usually means the fit or padding needs adjusting.
- Forgetting to recheck after a switch. A harness set for walking may not be right for car use.
- Attaching a tether to the wrong anchor. Use a secured point, never a movable object.
Recommended gear
A few items make fitting and everyday use easier, especially if you switch configurations often.
- Soft tape measure: Accurate chest measurement is the most important step before buying or adjusting a harness. View on Amazon
- Standard dog leash with a secure clip: A sturdy leash that matches your dog’s size keeps control consistent across walks. View on Amazon
- Pet car safety tether: If you plan to use the back attachment for travel, a dedicated tether helps you keep the length consistent. View on Amazon
FAQ
Do I need to measure my dog before buying a petsafe 3 in 1 dog harness?
Yes. Measure chest girth and, if listed, neck and body length. Compare those numbers to the manufacturer’s size chart instead of relying on weight or breed.
How tight should the harness be?
You should be able to slide two fingers flat under each strap. If you cannot, loosen it. If the harness slides around easily, tighten it.
Can I use the harness for both walks and car travel?
Many owners do, but the configuration and fit should be checked each time you switch. Use a secure anchor point for any car tether, and confirm the approach against the manufacturer’s instructions for your model.
Which attachment point should I use for leash walks?
The front ring gives more control during walks, while the back ring is common for calm walkers. Your choice depends on your dog’s pulling habits and training goals.
My dog seems uncomfortable in the harness. What should I check?
Look for rubbing under the front legs, straps sitting too high on the chest, or buckles pressing on the body. Remove the harness, check the skin for redness, and recheck the fit. If irritation persists, consult your veterinarian.
How often should I check the fit?
Check before every outing, especially if your dog has gained or lost weight, or if the harness has been washed. Fabric can stretch or shrink over time.
Is a harness safer than a collar for every dog?
A well-fitted harness reduces pressure on the neck, which many owners prefer for dogs prone to tracheal issues. However, the best choice depends on your dog’s health and behavior, so consult your veterinarian or a certified trainer for individual advice.
What if the buckle keeps coming loose?
Check that the buckle is fully seated and that the strap is not twisted. If it continues to release, stop using the harness and contact the manufacturer, because a faulty buckle is a safety issue.
Conclusion
A petsafe 3 in 1 dog harness works best when you start with accurate measurements, fit it step by step, and recheck after every change in configuration. Focus on the two-finger test, centered chest placement and secure attachment points. With those habits, the harness can serve well for walks, travel and everyday control.
Related reading
- PetSafe Easy Walk No-Pull Dog Harness: Fit and Use Guide (2026)
- PetSafe Easy Walk Comfort No-Pull Dog Harness: Fit and Use Guide
- Wild Ones Dog Harness: How to Choose and Fit One for Daily Walks
- Voyager Step in Air Dog Harness: How to Fit and Use It Correctly
Ready to choose one?
About Claire Whitaker
Claire Whitaker is part of our editorial team and reviews and edits our everyday pet gear guides, checking product details against manufacturer specifications and owner feedback.